2D Art
Mimetic, Pen & Ink-Wash Project
"I am always doing that which I can not do, in order that I may learn how to do it." - Pablo Picasso
"The permanence of ink encourages one to "go for it," to try to put the line right where it should be... continued attempts to place lines accurately build the eye-hand coordination necessary for sketching." - Paul Laseau
Theory
Pen and ink-wash is an elegant and beautiful art-making technique. It allows an artist to create an almost limitless number of subtle shades of grey that dance with one another in a "ballet" of movement and rhythm. When combined with linear elements using a fine nib, a composition can spring to life in unexpected and very pleasing ways. Pen and ink-wash can also be a surprising technique because it requires a tremendous amount of decision-making on the part of the artist, and yet the final results can never be fully predicted.
There's a Zen-like quality to doing a good ink-wash drawing: each stroke of the pen and brush must be applied to the paper with purpose, courage and with understanding because once the ink touches the paper, it cannot be undone. Stroke after stroke, the artist adds many layers of information to the image until volumetric shapes coalesce into recognizable forms; but beware... there comes a point in every ink-wash drawing when "enough is enough". To predict this moment, the artist must know when her drawing has a FULL RANGE of values, from the blackest black to the whitest white.
If a drawing's entire range of values were plotted on a graph, the normal distribution curve would have approximately 15% of the values verging on black and 15% verging on white. The remaining 70% would be progressively lighter tints and darker shades on either side of a perfect, middle-grey value. A lighter scene, such as a white rabbit in the snow, would be shifted toward the lighter end of the spectrum; a darker scene, such as a black panther at night, would be shifted toward the darker end of the spectrum.
Tutorial (Self Portrait)
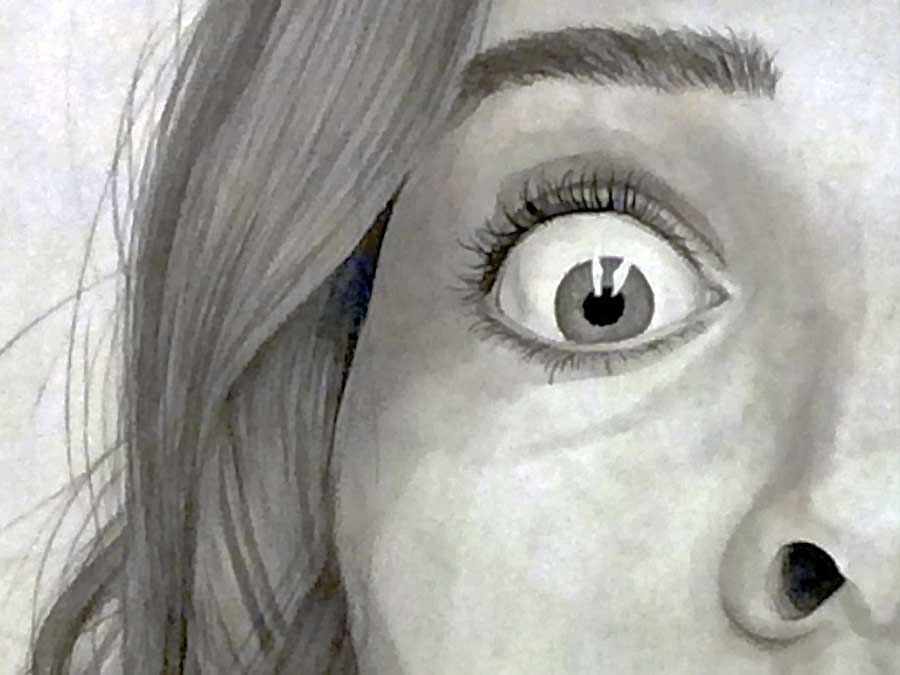
Rip your watercolour paper (140 lb minimum weight) to a suitable size of no less than approximately 16" x 20". Double tape it to your drawing board. You'll need a hand held mirror and at least one photographic reference (desaturated to black and white) to get started.
.jpg)
.jpg)
Sketch your likeness using an HB pencil with medium-light pressure. Next, stretch your paper with a foam brush and clean water (to soak the paper); the water will act like a fixative to hold the graphite in place. Let it dry a bit before repositioning it so that the wrinkles are smoothed out as much as possible, then let it dry completely before adding your ink washes.
.jpg)
.jpg)
.jpg)
.jpg)
Mid-tone values are blocked in so as to provide a relative point of reference, against which all the other values can be weighed. Lighter and darker values are then added.
.jpg)
.jpg)
.jpg)
Masking fluid (a rubber suspended in solvent, like contact cement) is the traditional method of retaining the pure white of the paper within small or delicate details, such as grey hair and whiskers. If masking fluid is not available, Higgins opaque white ink can be substituted and toned down with a bit of India ink and water if necessary.
.jpg)
.jpg)
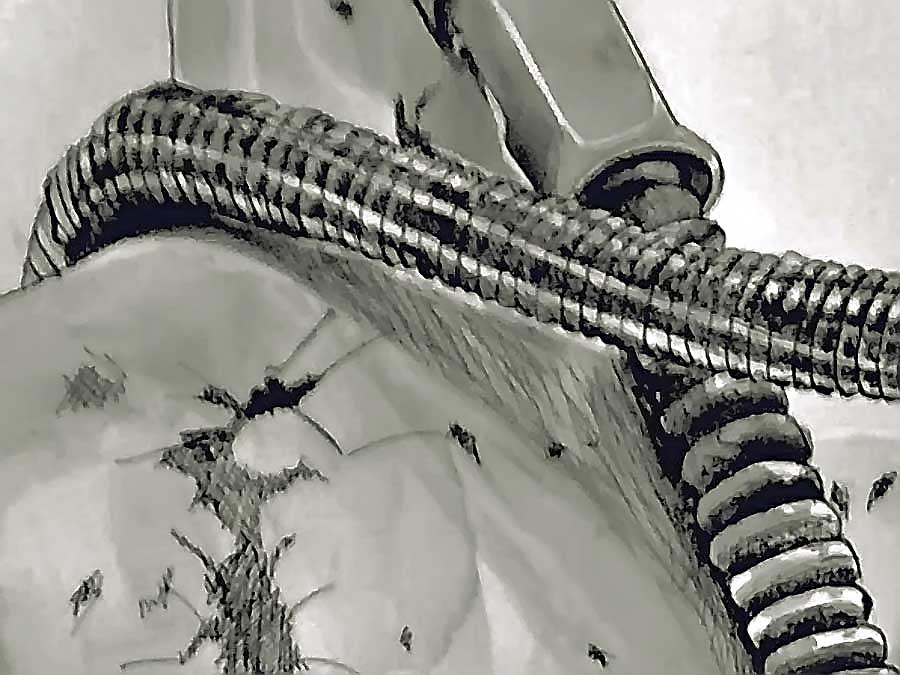
If your paper is warped, you can flatten it (from the backside) with a clothes iron set to "cotton" (without steam). Make sure that the image is laying on a clean, flat surface (protect it with new paper if necessary).
.jpg)
.jpg)
.jpg)
.jpg)
While some mistakes can be corrected (to some degree) with a mixture of Higgins opaque white ink, India ink and water, other mistakes (like the seepage of ink under the tape) can be removed by CAREFULLY scraping the paper (provided it's heavy enough) with a sharp blade and gum eraser.
.jpg)
.jpg)
.jpg)
.jpg)
To read about the history & theory of portraiture, go to: Expressive Self-Portrait Project
Examples of Student Work
.jpg)
.jpg)
.jpg)
.jpg)
.jpg)
.jpg)
.jpg)
.jpg)
.jpg)
.jpg)
.jpg)
.jpg)
.jpg)
.jpg)
.jpg)
.jpg)
.jpg)
.jpg)
.jpg)
.jpg)
.jpg)
.jpg)
.jpg)
.jpg)
.jpg)
.jpg)
.jpg)
.jpg)
.jpg)
.jpg)
Project Description
OBJECTIVE: Use permanent, black India ink on rag paper with a nib pen and several tinted washes to create a mimetic depiction of a still-life display or, if you're feeling adventurous, a self-portrait.
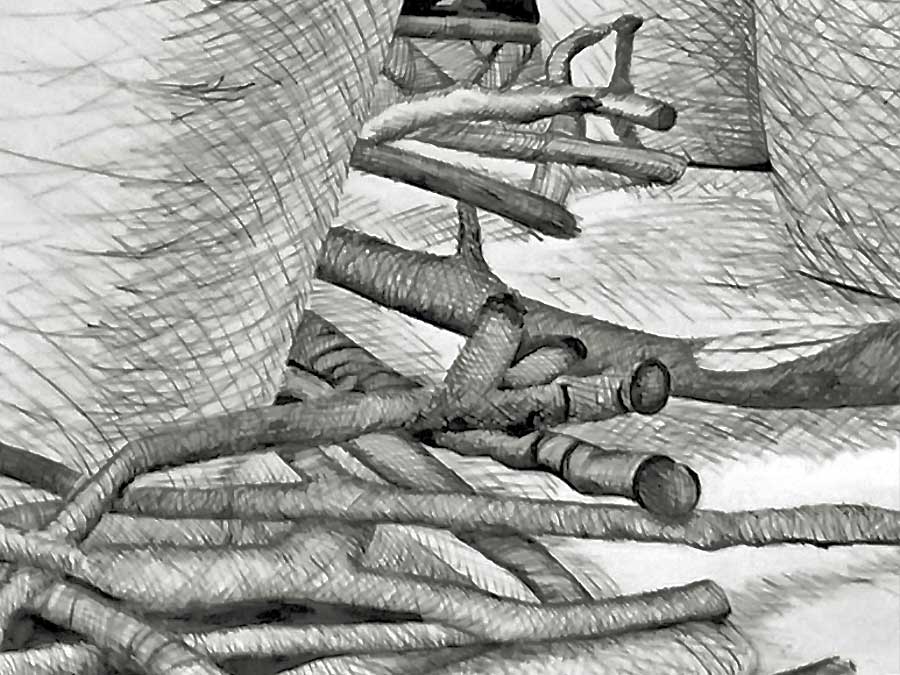
PROCEDURE: Using cups or plastic containers, mix a few drops of black, waterproof ink into a few ounces of water. Into a second container, mix a slightly greater amount of ink (e.g., six drops of ink instead of three) with a few ounces of water. Repeat this step a third time with an even greater amount of ink (e.g., twelve drops instead of six). You should also prepare a container that has a small amount of pure, undiluted ink in it and one large container that is filled with fresh water for rinsing your brush. Paper towels or rags should be kept nearby for mistakes that require blotting excessive solution off of the work and for cleaning your brush.
It's a good idea to begin by doing a few sketches; either in a sketch book with watercolour paper, or on a larger sheet of watercolour paper that has been divided into smaller sections. Use a hard pencil and lightly sketch a gesture of your still life. Dip your brush into the weakest wash. Begin your drawing by working the areas close to the highlights (the highlights themselves must be left alone because they will be represented by the whiteness of the paper). Lay down strokes in areas that contain the light values and work in a methodical way toward the darker values. The darkest areas of the still life will be the last values that you lay down. Linear elements can be added at any point using your fine, bowl-shaped nib with the undiluted ink or any of the washes that you've prepared.
TECHNICAL: Your drawing should depict a full range of values from white to black and many shades in between. This is easier to achieve if you proceed slowly and allow each layer to dry before adding more washes on top of them.
AESTHETIC: Be mindful of the Principles of Composition — Emphasis, Variety, Movement, Balance, Unity, Rhythm, Scale and Proportion — while you create your work.
Further Research
I would recommend this art video from an excellent PBS series:
- The Case for Realism (Art Assignment, Season 4 Episode 21 | 11m 13s)